The Great Penguin Rescue Evaluation

I am going to be critically evaluating my processes and techniques when developing my game for Living Coasts. I will talk about what went well and what didn’t, why and how I could improve in the future if I was to do something similar again.

Process:

My overall plan of how I wanted to produce my game was a good success, as I had managed my time efficiently and set personal goals for every few weeks to make sure I am on track for the deadline.

Using Sculptris over Cinema 4D to model my character was a really good idea and saved me a lot of time. As I have struggled making a character with Cinema 4D and I have never made a proper model in Sculptris either but Sculptris had the tools I needed and was very straight forward to model my penguin. The main disadvantage of using Sculptris is that my polygons was triangulated and not in quads, which could of cause problems for animating and UV more difficult however I did encounter either problem but they were a possibility.

In Unreal Engine, I wanted to have my jumping animation to work but I had to do a long process by following a tutorial. During the process, I had a good understanding of what I had to do but is also a useful technique for any other animations I may wanted to bring in by using variable values and blueprint that tracks my different animations, which simplifies what animation I want to play in specific situation.

Techniques:

A technique that I used when animating my penguin in Cinema 4D was using the side perspective viewport to really help my see how my animationg would look like from a 2D perspective. Making my walk and jumping animations was very easy to make and using the side perspective made it that more easier.

The technique I used to create my background for my game was straight forward as I originally wanted to try and make a background/ splash screen in photoshop but with my lack of photoshop skills I struggled so instead i turned to cinema 4D instead to make a static image by using the landscape and taking two textures to create a sandy African beach.

A very simple technique that helped me know what was what in each on my blueprints was making comment boxes where I could label my tutorials, animations and trigger boxes. So whenever I needed to go revisit a blueprint and adjust a node within the blueprint I could check the names I put inside a comment box to save me time checking through my bleuprints to find the variable I would have to adjust to create a different effect.

Improvements:

One major improvement for next time is that I need to have enough time to go out and record my own sounds for my game. As I have to use Unreal Engine’s sounds that comes with the engine as my ambient sound. Other than that I would have to find royalty free sound files as well for any sound effects that I may wanted to animate.

Living Coasts Penguin Gameset

This post is going to be my documentation throughout the process of me creating my own game for Living Coasts. I will be illustrating my screenshots to explain my processes and to show clear indication of development of my game.

Step 1: Modelling:

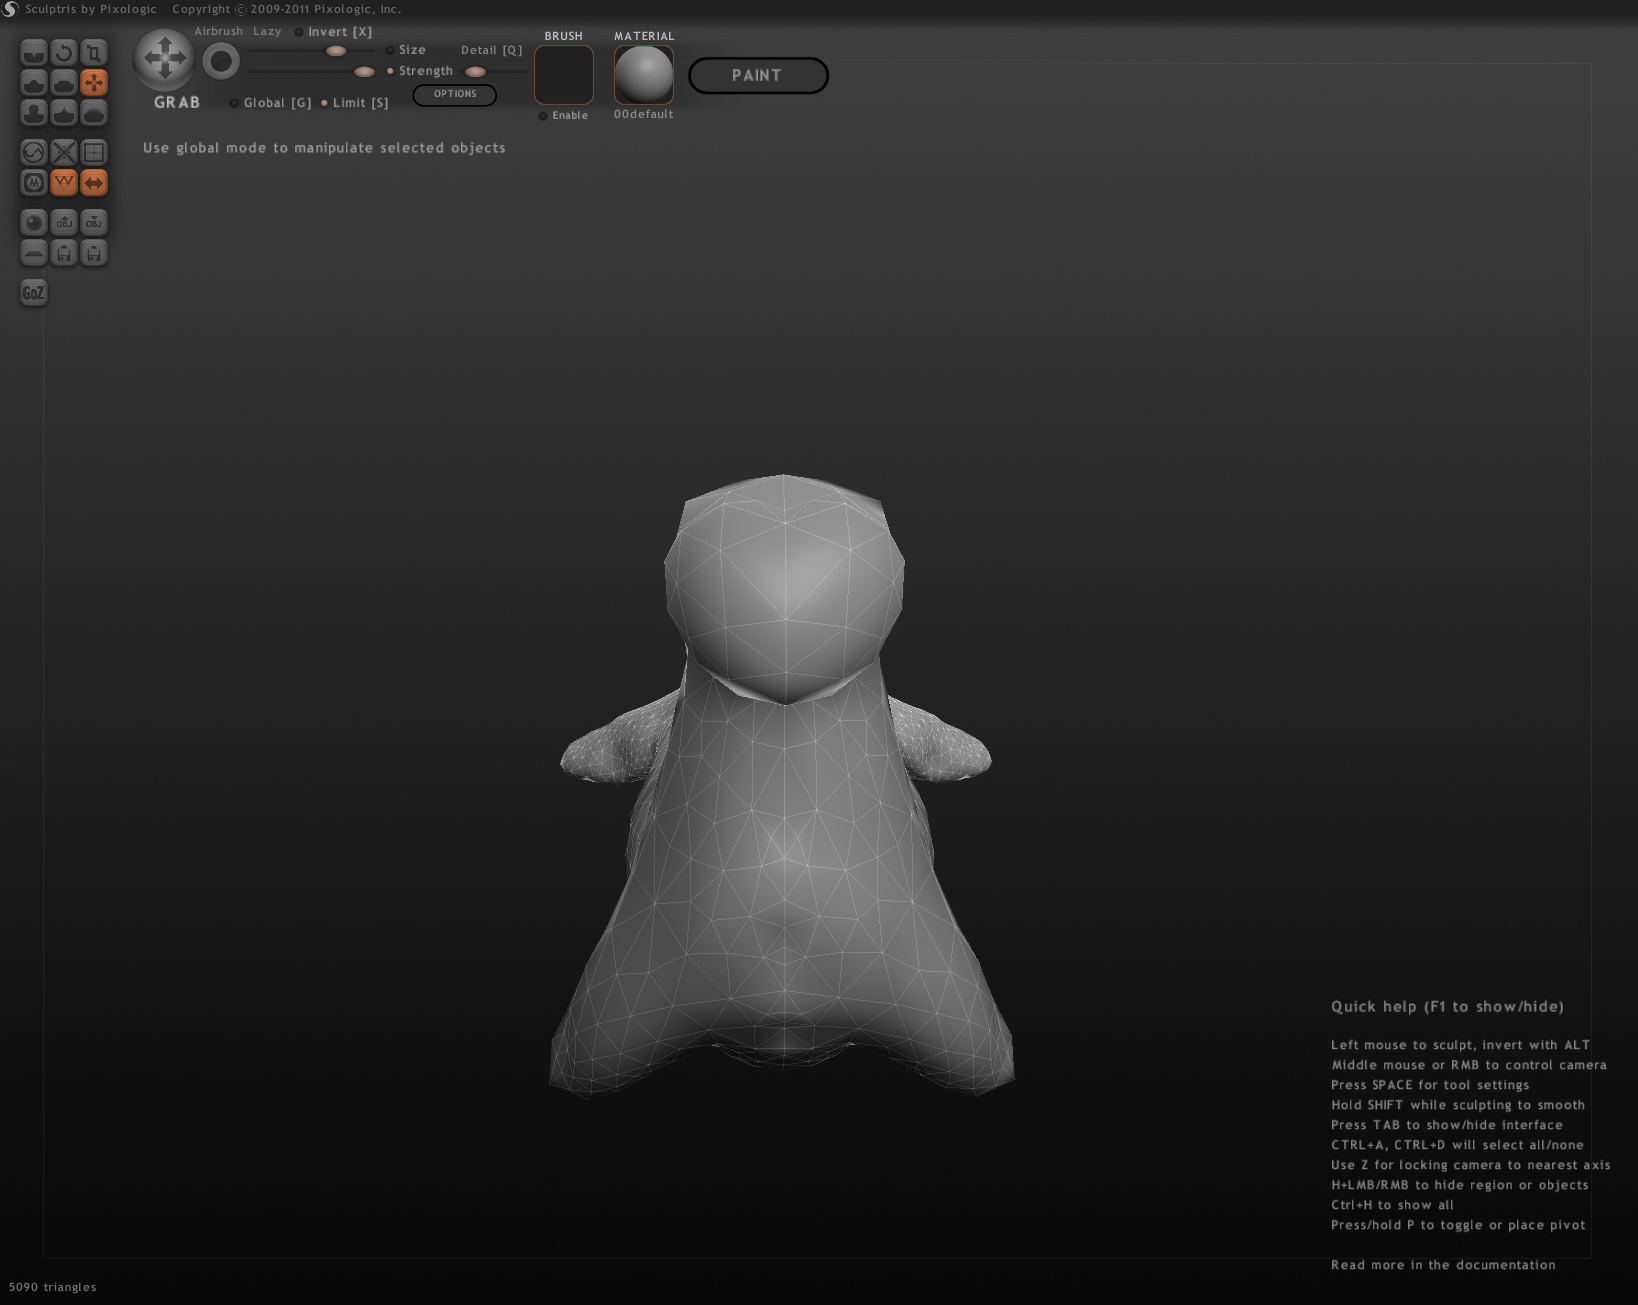
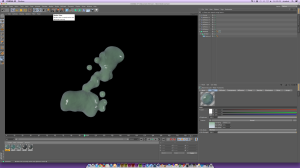
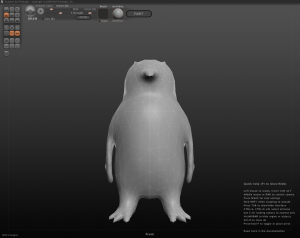
To start off with I want to create all my assets first for my game so for my character modelling I have used Sculptress. A free easy to use 3D modelling software that has the tools that I can use easily to make my main character of the game.

Screen Shot 2015-03-19 at 09.29.54Screen Shot 2015-03-19 at 09.30.49

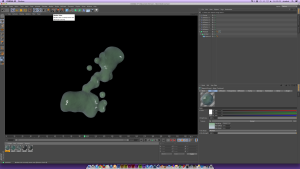
I also need to create my own platform to use in the game so I simply took the environment pre-set in Cinema 4D and flipped it upside down and gave it slight rescale to make the top of the platform flat to walk on and leave all the detail for the bottom part. Also to relate my platform to the brief I am working to and my environment is based around a South african beach, I am going to create 3 different textures as the level is going to have 3 layers to it. A sea level, Sandy beach and a rocky ridge. One option, I have to make sure is enabled is the Alpha Channel for rendering purposes inside my texture box.

Platform3Platform2Platform

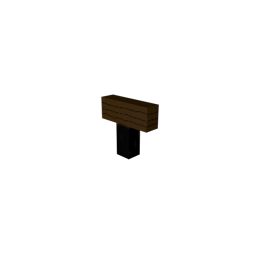
Last item I want to have in my scene is a signpost. the signposts role is to help inform the player how to play the game during the level. I took a straight froward Cube primitive and extruded 1/3 of the top half outwards so it has a slim stick stand.

Signpost Signpost2

Step 2: UV Mapping:

For my UV mapping of my penguin I made in Sculptress, I brought it into Cinema 4D , change my UI layout to BodyPaint UV edit and in that mode I had to select my object, which is the penguin and then specify what layers I want to create within that UV map. I chose just a normal map as I am going for a cartoon style with my penguin. All I had to do was use the appropriate colours to paint my penguin. Because I am creating a African Penguin then I need to make sure to correctly paint the specific pattern of its feathers as well as their colour to create a factual representation of a african penguin.

Screen Shot 2015-05-15 at 10.39.24 

Step 3: Character Rigging:

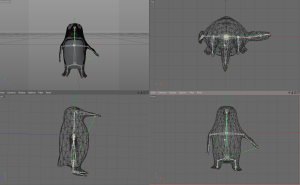
After UV mapping my penguin,I now needed to rig my penguin by using the joint tool so I am giving my penguin virtual bones so I can move his body and keyframe each animation. In cinema 4D i go into the character drop-down menu and select Joint tool. I make my first key joint where the hips should be and make a few joints up to his head. I select the second joint that I made, change the joint tool option to symmetry so when I am doing the arms and legs I do not have to them twice and that they’re created at the same time. Once all my joints have been created and adjusted into position, I go back into the character drop-down menu and select create IK to bind my joints to the object so once i move a leg joint the leg moves with it and that is when I know my rig works. Before I go any further I go back to all my joints in my assets folder and rename them to their appropriate body part.

Screen Shot 2015-05-29 at 14.35.23Screen Shot 2015-05-29 at 14.36.52Screen Shot 2015-05-29 at 14.37.08

Step 4: Animation:

For my animation, now that my penguin is all rigged and ready to animate, I get into my preferred perspective of how it should look if my penguin was already in the game and that is going to a side a view. I set up my first frame with both feet on the floor, keyframe that move the slider a few frames down and on that frame i will have one foot angled upwards and with auto keyframing enabled in C4D I don’t have to press the keyframe button again so I can move straight onto my next frame which is the two feet swap positions. Also to stop my penguin from looking like it doesn’t have a really static animation I made his arms swing and head bop up n down. That is my walking animation down and ready for rendering.

Screen Shot 2015-05-29 at 13.55.31 Screen Shot 2015-05-29 at 13.55.46

My second penguin animation is going to be a simple jumping animation, so I reset my penguin into his default position move the slider again and for this animation the feet are going to be angled downwards and his head is going to lift upwards. Move the slider again for him to revert back into his original position to be ready to go back into the walking animation. As I want to be able to create a smooth consistency between two different animations upon keypress in-game.

Screen Shot 2015-05-29 at 13.56.03 Screen Shot 2015-05-29 at 13.57.17

Step 5: Rendering & Imports:

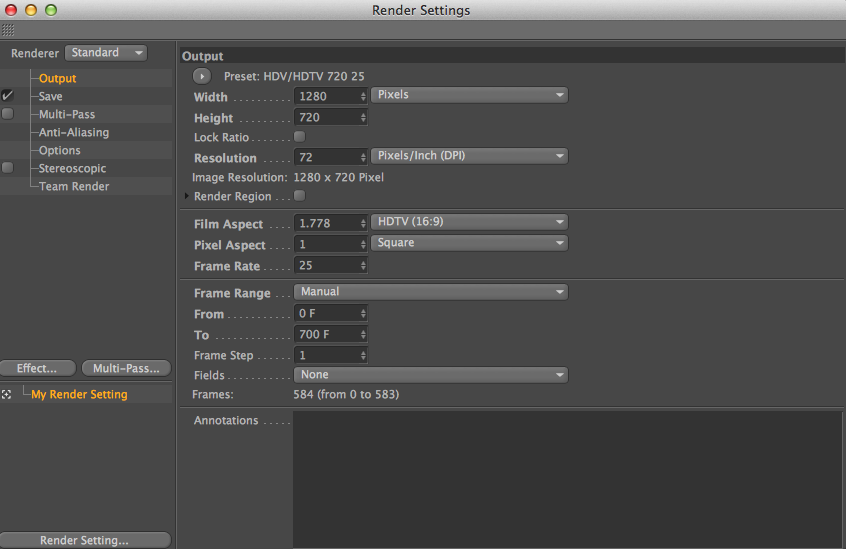
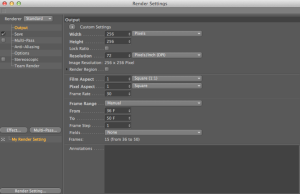
Now that I completed all my assets in Cinema 4D I need to render them out of Cinema 4D to being Unreal Engine eligible file formats. The key overall settings I used was the resolution size that 256×256 pixels as my game is going to be deployed on a mobile device so I did not want to have a oversized assets being brought into my games scene. I made sure the alpha channels were enabled and its file format is .PNG, which left specifying where i wanted each file to be individually saved to on my hard drive. Lastly all I did was render each of my scenes and animations through picture viewer in the side perspective as my game is a 2D side-scroller.

Screen Shot 2015-05-29 at 12.42.43 Screen Shot 2015-05-29 at 12.42.52

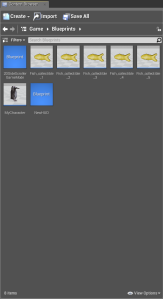
After rendering out all my assets and I have created my Living Coasts project folder for Unreal Engine, I brought in each of my assets into their correct folders to keep my assets organised and easy to access.

Step 6: Sprites & Flipbooks:

For all my created assets that I have created outside of Unreal Engine and imported into my asset folders, I need to transform them into sprites so that Unreal Engine can understand what that object is and allow me to set values for them in my game world. My 3 different platforms and signpost I had to highlight -> right click and create sprite. Now I have create my sprite I can drag and drop a platform sprite on to my scene and my pre-set character can walk across my personal created platforms when I press play.

Screen Shot 2015-05-29 at 11.25.26

For my penguin animations, I have a folder called Penguin and in that has each of my walking animation frames. I highlight all my frames create sprite again and whilst all my sprites are highlighted upon creation I right click again and “create flipbook” and called it PenguinWalk. I repeat this process again for my jumping animation which is in its penguin jump folder and called that flipbook PenguinJump. Also I do not have a penguin idle animation for when my penguin is standing still. I went back into my Penguin frames and took 1 frame of where the feet are both on the ground and created another flipbook called PenguinIdle.

Screen Shot 2015-05-29 at 11.25.37 Screen Shot 2015-05-29 at 11.25.47Screen Shot 2015-05-29 at 11.28.31

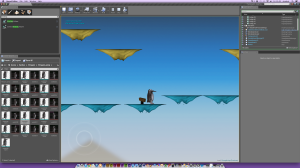
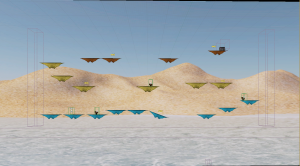
Step 7: Level Layout:

Now that I have all my sprites ready, I thought before continuing. I will use my platform and signpost sprites to start creating the look of my level. Replacing all the default platforms with my own platforms. Adding trigger boxes and killzones ready for me to specify them in my blueprints after.  Also placed a few blocking volumes to prevent player frustration of accidentally walking off the platform. This was only a short step but to show what I am trying to go for once my game is finished.

Screen Shot 2015-05-29 at 11.22.34

Step 8: Blueprint Animations:

Now for the different blueprint animations, I need to replace my current pre-set character that I have been given with my own penguin. I go into the Character Blueprints and change the flipbook animations from Character to PenguinWalk & Idle animations. However there is not a option the jumping animation. To apply my own jumping animation I have to take a few steps in order to have a jumping work by using an animation state machine.

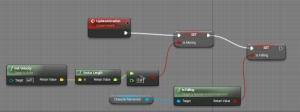
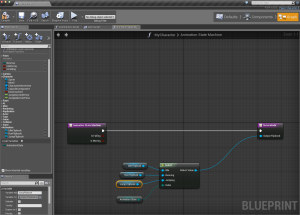
I start off with removing the Select box in the blueprints and taking the “Velocity” executable to variable to specify the character is moving. I also bring in a character Function for “character Movement” to specify wether the character is falling then connect it to the Update Animation. Then had to make another variable for falling and set that onto my blueprint graph that is connected to the previous variable.

Screen Shot 2015-05-29 at 11.18.43

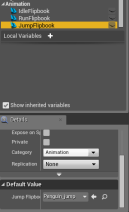
Now I create a brand new function and give it a name of Animation State Machine. Next I make 2 input values for my function and that those values are a boolean that I named; ‘isFalling’ and ‘IsMoving’. After I make a output value that is PaperFlipbook value and is named Output Flipbook. Now I needed to create a variable for each of my flipbooks; Idle, walk and jump and then specifiy flipbook type like the output again. Then set the corresponding flipbook to each variable. Walk to walk, jump to jump, idle to idle. To keep all my variables clean I put them all into their own category.

Screen Shot 2015-05-28 at 11.23.23Screen Shot 2015-05-28 at 11.27.05

I go back into my root folder in Unreal and create a new folder called Data and inside that I will create a new Blueprint called Enumeration. The Enumerater will be called AnimationState. Inside that blueprint I set 3 values by pressing the new button each time and naming each value, Walk, idle and jump again.

Screen Shot 2015-05-28 at 11.29.11Screen Shot 2015-05-28 at 11.31.56

I go back into the function blueprint to create a local variable that will only work inside that function only. That local variable will be called AnimationState and its type will be called the same again but now I will also have the Enumeration that I just created is now selected as my type. I bring in that variable, I get the variable and bring in a Select node and link the variable and select together. The select node updates itself with the three different values that I put into the enumeration blueprint from before so all I have to do is just link the correct variables its corresponding name on the select node.

Screen Shot 2015-05-28 at 11.32.19Screen Shot 2015-05-28 at 11.33.12Screen Shot 2015-05-28 at 11.33.47

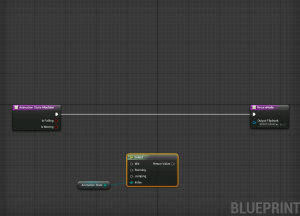
Next part is creating a few tests that automatically run when the game is being played, I had to create another local variable inside the function again and this one was called: ‘IsFallingLocal’ then I bring the variable onto the graph and connect it to the start of the function. I repeat this process again with ‘IsMovingLocal’. Now I create 3 tests in specific order so I do not confuse the system of the game. First test is the falling state, I create a branch off the previous node set the ‘IsFallingLocal’ variable as a condition. Now in my True executable I bring the enumeration variable again and Set it. I have an option box and I choose my jumping to set my jumping animation to be trigger when I am falling or when ever I am in the air. My false executable I make another branch off that so if my second branch condition is the ‘IsMovingLocal’ variable. Now if that branch is true I take the Enu variable again, set it as Walking and if false take the same variable again and set as idle. Once all my three tests are set. I take a reroute node and take all 3 executables from my enumeration nodes and link them to the 1 reroute that goes into return node at the end of the whole function. I save it all and compile it.

Screen Shot 2015-05-28 at 11.36.08Screen Shot 2015-05-28 at 11.37.55Screen Shot 2015-05-28 at 11.38.57Screen Shot 2015-05-29 at 11.22.52

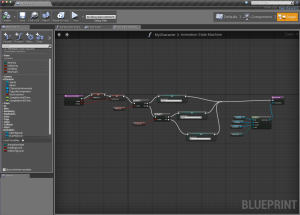
Back inside the character blueprint, I bring in the Animation State machine function connect all the nodes together, that is the conditions and previous variables that all finally goes into my ‘Set flipbook’ function. Compile and save all that again and now when I play my game my character still walks and stands still correctly but also has a jumping animation as well.Screen Shot 2015-05-28 at 11.41.44

Step 9: Other Blueprints & trigger events:

After my animation blueprints were complete I went on to making my other active actors in-game come alive by creating the necessary blueprints for each one, killzones, double jump and triggerboxes.

First one I did because it was very straight forward was the killzone for when the player falls off the level it restarts and places them back at the beginning of the level. I open up my level blueprints, select Killzone – BeginEventOnOverlap node and I drag off its executable and bring in the Open Level node. Type the name of my name level into the node of what I want to open: Example_Level and now every time my character interacts with the killzone the level resets.

Screen Shot 2015-05-29 at 11.40.11

Second Blueprint I chose to do was the Double jump for my penguin inside the character blueprint. I make a new blueprint jump starting with the normal jump node that goes into the Do N where it creates a counter to stop my character from endlessly double jumping and that executable goes into a switch so it tells my character to jump and a second node is for specifying the different velocities for when the double jump is activated.

Screen Shot 2015-05-21 at 10.41.33

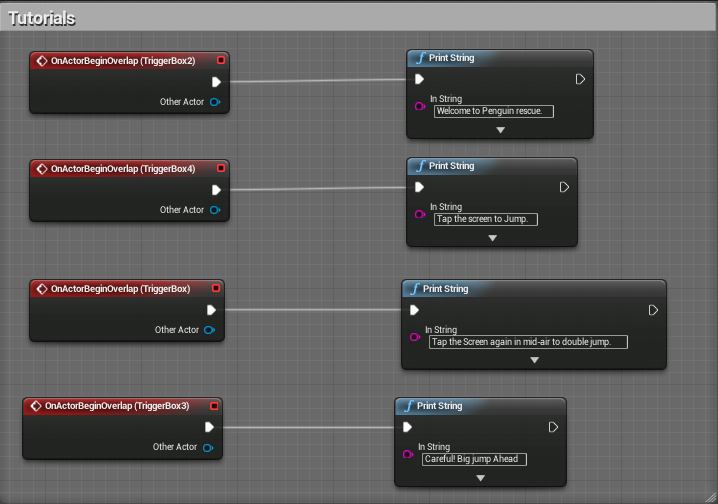
My third set of event triggers are text pop-ups that tells the user how to play the game. I go to my Level Blueprints and when I have a TriggerBox on my scene the blueprints will identify that when I right click and give me a list of options and I choose BeginEventOnOverlap like the killzone and I drag out from the executable and bring in a Print String node and inside that node has a editable textbox that allows me to put anything information that I want to pop up on screen when the player interacts with it, for example: “Tap the screen to Jump” and this message will pop-up during play for a few seconds.

Screen Shot 2015-05-29 at 13.47.59Screen Shot 2015-05-29 at 13.49.27

Step 10: Item pickups:

I have decided I wanted to add little pick ups during the course of the level so when the player walks over a fish the fish disappears and on-screen text appear saying fish collected 1/5. To do this, I had to select my sprite and turn it into a blueprint. The first part I had to do was change the collision on my mesh to OverlapAll. Then in the blueprints, I chose my mesh dragged off the executable to Destroy Actor for when my character collides with the fish it disappears then the print string node is for the text that appears once the fish has been collected.

Screen Shot 2015-06-05 at 10.24.20Screen Shot 2015-06-05 at 10.24.29

Step 11: Sound:

As I do not have enough time to go out or record my own sound for my project I have implemented a preset ambient background sound to start up as soon as the game begins. To do this I had to open up the level blueprints bring up the ‘Event Begin Play’ node and connected it to the ‘Play Sound at location’ node and selected the ‘Starter_Music01’, which is calming soundtrack and nothing over the top or dramatic and it personal opinion, I think it suits the scene.

Screen Shot 2015-05-29 at 14.10.16

Step 12: Background:

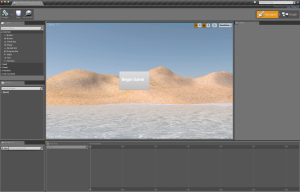
For my background I used Cinema 4D to create my backdrop as I wanted to create a beach so i used the landscape and adjusted it using the magnet tool to create hills and smoothen out a few areas. To create the beach look, I used 2 images from google to get a sand texture and another image of the sea just reaching the beach so I can overlap a box primitive with the sea texture to create the overall beach setting.

Screen Shot 2015-06-05 at 10.23.51

Step 13: Menu/ End-game:

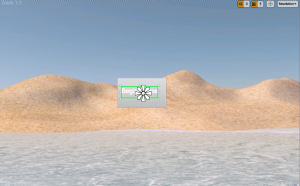
Lastly I need to have a splash screen for my first scene when the game starts and a congratulations screen for when the player completes the level. To do this I had to create two individual levels and two widget blueprints. In my widgets I had to set up my scene by dropping in text boxes and buttons so I am telling the software where I want my buttons and text to appear on screen when it’s playing. I also dragged in the image to fill up the rest of my widgets background so I don’t have a black empty looking menu. The image I used was my background to relate keep it all related to African penguins. Also in my widget after I finished the layout of my menu in the top left corner of the widget is a sun like icon and for each item inside my widget I had to take the sun and drag it on top and treat it like it was a camera otherwise when I play my game my menus will be in the bottom right corner of my screen instead of the centre.

Screen Shot 2015-06-05 at 10.25.31Screen Shot 2015-06-05 at 10.26.13Screen Shot 2015-06-05 at 10.10.52Screen Shot 2015-06-05 at 10.10.30

After doing all the designing part of the widgets, I go into the graph section of my widgets and start making the blueprints for the widget. All I need to do is make my button start my game upon key press. Part of that blueprint I needed to set a mouse cursor so I can test it otherwise I wouldn’t be able to select my buttons without the cursor also I have to tell the blueprint once my button has been pressed and opened the level I have specified I need add the ‘remove the viewport’ node so on the level that has been opened the widget is not appearing on the level as well blocking the view of the character.

Screen Shot 2015-06-05 at 10.10.07

The last part to creating my menus is that i have to go into my level blueprints to set my widgets in place. On my first level is splash screen so I set my ‘Begin_game’ widget to appear first and to make it physically appear on screen then I need to tell Unreal to ‘Add to viewport’ that comes straight off my widget node and once again set my mouse cursor in place so i can interact with my menu. I repeated this process for the Level_complete menu as well so now my game is now complete with menu’s and it correctly loops in the order I want it to play.

Screen Shot 2015-06-05 at 10.34.09

Problems I encounter during the development of my game:

During the course of developing my game for the client I didn’t have that many problems encounter during the different stages.

One of the problems I mainly encounter was my Penguin model where my first model had his flippers down like a normal penguin, which caused animation problems because of the weighting between joints were affecting the main body as well as the flippers. My solution to this problem was that I just had to re-open my sculptress model, remove the arms and sculpt them again but put my penguin in the T position to avoid weighting issues during animating stages.

My second problem I encounter was exporting my penguin were I used imagery for UV mapping to give my penguin a more realistic effect I wanted to go for in the beginning. When I tried to export my penguin it would not pick up that imagery as there was no alpha channel found on those pieces of the UV map. My solution to was to give up the realistic effect and use the normal body paint tools and paint my UV map and I was satisfied with its outcome.

A third problem that I encountered was when I imported my frames of my Penguin Animations into Unreal Engine from Cinema 4D. For some reason each frame looked darker than they originally did and the texture on penguin looked completely black and grey nearly during play tests. The solution to this problem was quite simple as I had to go into each frame individually and I turned the brightness of the frames from 1 to 11 to make my penguin clearly visible.

Fourth problem i encounter was another import problem where my animated jump during play would dramatically downscale my penguin’s size. For this one I had to go into each individual sprite frame of my jump animation and decrease the pixels per unit from 1.28 to 1.04 so when my penguin jumps they look equal in size. Its not perfect but it cannot be noticed during play now.

CV

Liam Reynolds

8 Broadsands Avenue

Paignton

TQ4 6JN

Liamreynolds01@live.co.uk

Profile

I am a independent worker that likes to be efficient, organised and do every task to the best of my ability. I have a medium amount of experience with different software’s for designing/ modelling and animating while still learning new and different techniques. For many years I have had a strong interest in game design, I have seen how games have developed over the years and how far they have come and I want to take what has been done today and push it beyond there boundaries even further with a strong development team. I am good team worker and have the ability to communicate with anyone and offer personal ideas and opinions with the considerations of others. One of my skills I prioritise the most is 3D modelling and animating. I enjoy modelling different objects out of nothing through creativity.

Education

2014-16           Games & app Design                                                               Grade:

2012-14           Level 3 interactive Design                                                       Grade: Triple Pass

2010-12           English Language & Literature                                                            Grade: C

Mathematics                                                                            Grade: C

Science                                                                                               Grade: A

I.C.T                                                                                        Grade: C

Paid Employment

2013-15           Assistant, Riviera Plastering.

  • Cleaning tools,
  • Work preparations
  • Unloading and loading equipment.

Achievements

2013                Took part in the National Citizenship Service (NCS), where I took part with a group of people to help raise money and awareness for charitys within my local community.

2014                For my first year doing FdA degree, I was Course rep for the course. I bring up any issues that may need to be resolved within the course.

Contextual Research

For one of my practical assignments I had to do for my digital applications module I had to research into Unreal Engine’s Blueprint system and how I can make the most of it. I wanted to know how I can add some basic User interfaces to my scene, level timers and event triggers.

The first one I researched into was adding a simple timer to my level and I came across a community forums for Unreal Engine specifically on how to create a timer with blueprints. The tutorial was very effective as it was catered to my learning style making it easy for me to follow and work at my own pace, which in return helped my practical work inside Unreal Engine. The research allowed me to solve my problem in a short amount of time and progress to the next section of my project, which was getting level triggers to work inside the game.

Screen Shot 2015-05-14 at 11.01.44

At the beginning of loading up Unreal Engine. There was a tutorial section that was dedicated to level triggers that I could follow along whilst I had my project open next to it. The tutorial was straight forward and had clear indications of what steps I had to take and how to achieve my final outcome. After a few different tests using the tutorial I had been following, I had a clear understanding of how level triggers work

.Screen Shot 2015-05-14 at 11.03.39

Last tutorial I wanted to look up to include in my project to make it look more professional was adding some basic UI. Once again under the different categories that epic games have a list of tutorials for Unreal Engine and I used another one for User interfaces. This tutorial was a bit more complex but I was able to follow it step by step that by the end of the tutorial I had a complete piece of User interface as part of my scene once I test my project.

Screen Shot 2015-05-14 at 11.00.09

To conclude my overall contextual research and how each bit of research I look into to help aid the development of my project within my digital applications module. i would say it was all effective as I was able to look each individual tutorial to provide the information I needed and that my final test project was a success. Not only has my research help me with my research but gave me a better understanding of what I can now do within Unreal Engine for future projects.

Theoretical perspectives

During the course of my visual communication module, I decided to select the Reductionist and semiotics theory in my research because a lot of the topics I was researching into were good examples of the 2 theories. After researching more into semiotics and Reductionist’s, cause and effect, they are very simple theories that I can put into practice during my research.

Example semiotics and Reductionist theory:

I used the reductionists theory for cause and effect and explain how it comes into effect when playing a video game with a simple and straight forward description the UI of the game i used as part of my personal research into the topic. I discussed how the theory works via visuals that the theory also relates to the “loop of interaction” –  “Cause and effect: If I want to use an ability or a healing potion in game that appears on my toolbar in-game then I simply press the allocated key for that option, which may be Q, E or R on my Keyboard and then the game will respond by doing a special animation on screen and if I avert my eyes back to my toolbar it will show that my ability / potion worked correctly by showing a timer over the icon of that ability / potion.”

The use of the two theories really helped me have a better understanding of semiotics and reductionist after I put my research into effect and using these theories and in return it really helped develop my personal discoveries during the visual communication module itself.

Successful Independent Project

During the course of the year, all my projects have been done independently and I have had to not rely on others or do any group work that I can reference for successful group projects, as clarification.

A project that I have worked independently on and has stood out the most and that I would reflect on would have to be one of my self-initiative projects for Digital Skills, making my own digital Artefact, “Invisible Maze Game”. At the time, I was new to Unreal Engine 4. Have very little experience with it but I took my basic modeling techniques and the tools that the engine had to offer was enough for me to make my basic outline and of my game. One of the key success about this project was researching how to use Unreal Engine’s Blueprint. For something simple it went quite well, learnt a few other techniques on how to use Unreal better in the process while understanding the process’ of what I needed to do in unreal lead me to a more positive perspective and I wanted to do more than I originally I set myself to do using unreal tutorials and adding small features to my game.

Looking back on that project and seeing what I could possibly improve during that project possibly make it more interactive as it was a very simple and basic design but its original concept was to learn and understand the software better for future projects, which has helped given me a better understanding of what I could within Unreal Engine.

Successful Practical Outcomes

For my first Successful practical project, I was creating a water simulation effect within Cinema 4D without using any 3rd party software. The technique was very simple as long and I don’t forget to add key assets to my scene. For example, I have a box created where my object can bounce around inside and no where else. After bringing in the gravity into the scene my water simulation looks more realistic to see it falling and merging into one big mesh like you would see water come together on a window during a rainy day. This is the outcome of my Simulation:

screen-shot-2015-04-24-at-12-23-15

My second successful practical outcome is when I was trying to create a realistic penguin walk animation. The penguins don’t have a simple straight forward animation like ourselves. Instead they waddle from side to side when walking forwards. I used Cinema 4D’s CMotion and used some of the values I can add via CMotion to create my realistic penguin walk before I export it to bring it into Unreal Engine later. With certain CMotion values I have to adjust the values slowly otherwise when the penguin walks he does a full turn than just moving his hips.

Screen Shot 2015-05-08 at 13.46.04

My third successful practical would have to be my modelling of my animals I created within Sculptres. Sculptres is a new program that I started using this year and its takes some time to actually create a nice visually appealing mesh with the limited of tools you have. I made 3 individual animals for my living Coasts game (Penguin, Bird and Seal). Creating a detail animal can consist of a lot of polygons and animal I had to try and keep each one under 10,000 polygons, which I did successfully and reducing the poylgon count via sculptres can be tricky because if I was to reduce it too much in one area it would mess up the shape for example like the feet or arms would be too thin or have a random whole because the polygons were removed after being reduced too much.

Screen Shot 2015-03-19 at 09.29.54 Screen Shot 2015-03-19 at 09.43.37 Screen Shot 2015-03-19 at 10.02.26

Digital3D Animation Development

For this digital Artefact, It is a short animation that shows basic understanding and skills of animation in Cinema 4D. I used basic frame by frame animation techniques.

To start off my scene, i didn’t want to use any big terrains so I can avoid long render times instead I just wanted to use the basic primitives and objects provided by the program and do it within in a basic 3D space.

because the animation was going to consist of a 1 man bobsleigh I decided to model that first which started out as simple Box primitive that I used basic modelling techniques till I formed a smooth curved base shape of the bobsleigh by using a subdivision surface.

Screen Shot 2015-05-07 at 11.21.10

For the Skies that attach to the bottom of the bobsleigh I used an Arc spline and a extrude nerb to give the spline a physical appearance in the 3D space. Once I moved the skies around and put them into place, i added some last details to the bobsleigh by taking a few cylinder primitives to use as the joints.

Screen Shot 2015-05-07 at 10.38.01

Now that I finished my bobsleigh model, I brought in a pre-made character from Cinema 4D to use as my puppet for the animation. I did the simple frame by frame animating technique without using any of the other animating techniques that are available such as CMotion. I selected individual joints on the character, rotated and moved them into each position of my scene. I also had auto keyframing enabled so I did not have to press the keyframe button after each action.Screen Shot 2015-05-07 at 10.29.54Screen Shot 2015-05-07 at 10.33.44

As my bobsleigh and character are two separate objects in my scene, I used a connect, which is basically a folder for objects. This saved me a lot of time because once I got my character into my bobsleigh I didn’t have to animate them separately using the same path instead the connect allows me to animate the two objects simultaneously.

Screen Shot 2015-05-07 at 10.29.06

Once I have done all my animations, the last thing I had to do was bring in a camera to and create a path for it to follow my bobsleigh. For a little effect just to show the audience that it is the end of the animation I brought in some 3D text and put finish at the end of it.

Screen Shot 2015-05-07 at 10.32.57Screen Shot 2015-05-07 at 10.27.17

This a quick outline of my render settings that I used when exporting my animation I did it in 720p at 25 fps, which is standard for an animation. 30 fps might of been better but it was easy enough to use one of the HD presets. I exported via TIFF files as I brought would bring it into Adobe After effects to have a cleaner and better quality animation.

Screen Shot 2015-05-07 at 11.41.04Screen Shot 2015-05-07 at 11.41.12

Digital Artefact – Water simulation

For one of my digital artefacts and wanted to create a quick and simple water simulation in Cinema 4D using the metaball and emitter technique.

Once I have loaded up cinema 4D the first thing I want to do is bring in 4 Sphere primitives and make a square out of them. I also want to change the sizes of each individual sphere so they are all different sizes to help prepare before bringing in the metaball. Once I have completed the previous step, highlight each of the spheres and drag them into the meta ball property so the spheres creates a mesh together that I can move and adjust by selecting individual spheres.

Screen Shot 2015-04-24 at 11.42.37  Screen Shot 2015-04-24 at 11.43.01

Before I bring in the emitter, I want to create a box out of deflectors so i search “deflector” in cinema 4D bring one on to my scene and increase its size because I want to have a big box that can hold the mesh that is created by the emitter. I duplicate my Deflector multiple times so I do not keep bringing in the standard deflector from cinema 4D.

Screen Shot 2015-04-24 at 12.07.17

After I have my box of deflectors, I search emitter in cinema 4D and bring in a emitter once, the emitter is in my assets and my scene I drag and drop my emitter into the metaball and I move my spheres and place it into my emitter. Now I should have an emitter spawning 4 spheres that moulds together on impact inside the deflectors once I press the play button.

Screen Shot 2015-04-24 at 11.45.36Screen Shot 2015-04-24 at 12.19.49

When watching my mesh take form it was taking up a lot of processing power on the hardware I was using so I took out a few spheres that the emitter was continuously emitting so I could watch a smoother motion of my water simulation. Even with less spheres inside the emitter its still create a well formed mesh at a slower rate. Last of all I went into some of the preset textures that Cinema 4D has and brought in a “Liquid – sea” texture and applied it to my sphere to give it a ocean like feel.

Screen Shot 2015-04-24 at 12.11.57Screen Shot 2015-04-24 at 12.23.15